TL;DR
Moving your rig into a closet can drastically cut noise if you treat the space right. Focus on absorption, sealing gaps, and proper placement to make a small space work for voice or recording. Soundproofing isn’t just foam — it’s about sealing, mass, and airflow.
Ever wonder why some tiny closet studios sound surprisingly good? It’s not magic — it’s smart placement, proper treatment, and understanding what truly blocks noise. The secret isn’t just about foam panels; it’s about making your small space work for you. Home gym equipment and setup tips.
If your goal is a quiet workspace for recording podcasts, vocals, or voice-over work, moving your setup into a closet can be a game-changer. But only if you treat it like a small acoustic space first, and soundproof it second. This guide will show you how to do both — without spending a fortune or sacrificing your headspace.
Acoustic dampening
& the rig in the closet.
The most powerful noise fix isn’t a material — it’s a floor plan. A rig you can’t hear because it’s in another room beats any amount of foam. Tap the approaches in Part 1 to see what actually works.
(another room)
(levers 1–4)
(door / barrier)
(acoustic foam)
Contain the noise, not the heat
Key Takeaways
- Prioritize distance and sealing gaps over foam for effective noise reduction.
- Place the mic near absorption points — behind, above, and beside — to minimize reflections.
- Use thick blankets, panels, and rugs to absorb reflections, especially in small spaces.
- Seal the door with weatherstripping and consider blankets to block sound leaks.
- Ensure proper ventilation with quiet fans to prevent overheating in a closet rig.

Focusound 52 Pack Acoustic Foam Panels 1" x 12" x 12" Sound Proof Foam Panles Soundproofing Noise Cancelling Wedge Panels for Home Office Recoding Studio with 300PCS Double-Side Adhesive
Soundproofing - Acoustic foam panels triangular grooves structure for better noise absorption, helps to reduce and absorb unwanted...
As an affiliate, we earn on qualifying purchases.
As an affiliate, we earn on qualifying purchases.
Why a closet can be your best friend for soundproofing
Closets are dense, small, and often have fewer reflective surfaces than big rooms. These tiny chambers naturally cut down echo and reverb, especially if you add some soft materials. For example, a 3x3 closet with a few blankets and foam can be a surprisingly effective vocal booth.
Imagine a singer recording in a closet with foam on the walls and a thick rug on the floor. The close walls absorb most reflections, and the small space keeps sound from bouncing around wildly. The key is to treat the surfaces that matter — behind the mic and near your voice — while sealing gaps that leak sound.
Why this matters: small, dense spaces inherently reduce reverb, making your recordings clearer and more focused. However, they can also trap low frequencies, which might cause muddiness if not managed properly. The tradeoff is that tight spaces can sometimes amplify bass, so understanding how to treat and seal them is crucial for a balanced sound. Learn more about acoustic treatment.

8 Pack - Bass Traps Acoustic Foam Corner, 8''x8''x12'' Black Bass Traps Corner Studio Foam, High Density and Fire-Proof Acoustic Panels Recording Studio Acoustical Treatments
Acoustic Principle- Bass Trap is a kind of sound absorbing structure specially used to absorb specific low-frequency standing...
As an affiliate, we earn on qualifying purchases.
As an affiliate, we earn on qualifying purchases.
How to position your mic for the best sound in a tiny closet
Your mic placement is everything. In a small closet, the goal is to minimize reflections and capture your voice directly. For example, position the mic about 6-12 inches from your mouth, slightly off-axis, and aimed at the mouth itself. Check out our home gym setup guides.
Next, identify reflection points: the wall behind you, the ceiling, and nearby hard surfaces. Use a simple mirror trick — move a mirror along the walls until you see the mic’s capsule reflected. Treat these spots with foam or blankets.
Why this matters: Proper placement reduces the amount of direct sound that reaches your mic from reflective surfaces, which helps keep recordings clean and dry. Positioning away from reflective surfaces minimizes flutter echoes and low-end booms that can muddy your sound. The tradeoff: placing the mic too close can cause proximity effect — an exaggerated bass — so finding the right distance balances clarity and natural tone. Using a boom arm or adjustable stand allows precise control, ensuring you stay within the sweet spot for your voice.
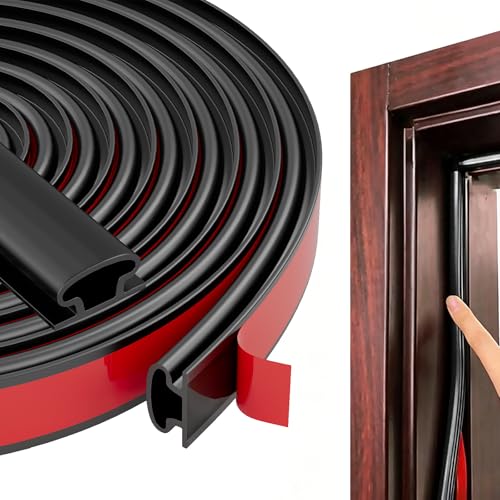
Black Rubber Weather Stripping Door Seal Strip, D Shape Door Weather Seal Strip, Self-Adhesive Soundproofing Frame Insulation Tape for Doors Frame/Window Seal,Blocks Cold Drafts Noise
【THICKENED SILICONE MATERIAL - COMPLETELY BARRIERING AIR AND NOISE】:The weather stripping is made of thickened TPE material with...
As an affiliate, we earn on qualifying purchases.
As an affiliate, we earn on qualifying purchases.
Absorbing sound: foam, blankets, and DIY tricks that work
Acoustic dampening in a closet is all about absorbing reflections near the source. Foam panels are popular, but blankets, moving quilts, and even thick curtains work too. For instance, hanging a thick blanket behind the mic and on the side walls can cut flutter echoes by 60%.
Use soft, porous materials on walls near the mic and ceiling. Rugs or carpets on the floor help reduce floor reflections, especially if the closet has a hard surface. Thinner panels (1-2 inches) are fine for high frequencies, but for bass and low-end control, thicker or bass traps are better.
Why this matters: Effective absorption reduces reverberations that can cause muddiness and echo, especially in small spaces where reflections bounce quickly. Covering key reflection points — near the mic, on the ceiling, and adjacent walls — ensures a more controlled sound. The tradeoff: over-absorbing can make the sound too dead, so balance is key. Combining different materials, like foam for high frequencies and bass traps for lows, gives a more natural and balanced tone.

Sound Addicted - Studio Monitor Isolation Pads for 5 Inch Monitors, Pair of Two High Density Acoustic Foam which Fits Most Speaker Stands | SMPad 5
SMPad 5 is made out of the highest quality acoustical foam (50kg/m^3 density).
As an affiliate, we earn on qualifying purchases.
As an affiliate, we earn on qualifying purchases.
Sealing the door and gaps: stop sound leaks effectively. Learn more about soundproofing techniques.
The weakest link in a closet studio? The door. Sound escapes through gaps, hinges, and cracks. Sealing these is a quick win. Use weatherstripping around the door frame, and consider adding a heavy blanket or acoustic door seal if needed.
For example, a simple foam weatherstrip can cut sound leaks by half. Some creators hang an acoustic blanket over the door, which absorbs sound and prevents leakage. Remember, sealing gaps is essential if you want to keep outside noise out or prevent your sound from escaping.
Why this matters: Gaps and cracks are major pathways for sound to leak in and out, reducing the effectiveness of your treatment and potentially disturbing neighbors or capturing unwanted noise. Proper sealing creates a more controlled environment, allowing your treatment efforts to work more efficiently. The tradeoff: over-sealing without proper ventilation can lead to stuffiness and overheating, so balance is essential. Using draft stoppers and sealing all visible gaps helps maximize soundproofing without sacrificing airflow.
Controlling low-end boom in tiny spaces: bass traps and tricks
Small closets tend to trap low frequencies, creating a boomy, muddy sound. To tame this, add bass traps in the corners or use thick foam panels that absorb low-end rumble. For example, a 2-foot bass trap in a 3x3 closet can reduce low-frequency buildup by 50%. Explore bass trapping options.
Placement matters: focus on the corners and areas where low frequencies tend to concentrate. If bass becomes a problem, consider installing DIY traps with Owens Corning 703 or Rockwool wrapped in fabric.
Why this matters: Low frequencies are the most challenging to control because they tend to resonate and build up in small, enclosed spaces. Without proper treatment, your recordings may sound boomy, muddy, or indistinct. Bass traps in the corners intercept these frequencies before they bounce around, improving clarity. The tradeoff: adding bass traps can reduce usable space and may require some DIY effort, but the resulting sound is significantly cleaner and more professional. Using a frequency analyzer helps identify specific problematic peaks, allowing targeted treatment that maximizes effectiveness while minimizing unnecessary material use.
Ventilation: keeping your rig cool without noise leaks
Running a powerful rig in a closet means heat buildup. The key is to keep it cool without letting noise escape. Use quiet, ducted exhaust fans or active ventilation systems. For example, a low-noise inline fan connected to a duct can pull hot air out while staying under 30 dB. Learn about air quality and ventilation.
Ensure the space has some airflow: passive vents, or a small fan with soundproofing around it. Don’t fully seal the closet unless you add controlled airflow to prevent overheating. Check the temperature regularly — a hot rig will throttle, causing noise and shortening hardware life.
Why this matters: Overheating can cause your equipment to throttle, which increases noise levels and reduces performance. Proper ventilation maintains a safe operating temperature while preventing sound leaks. The tradeoff: adding ventilation can introduce noise if not done carefully, so selecting quiet fans and soundproofing ducting is essential. Combining ducted exhaust with soundproofing measures ensures airflow without compromising sound isolation.
DIY vs. professional soundproofing: what’s worth it?
DIY solutions like blankets, foam, and weatherstripping can improve your closet’s sound quality at a fraction of the cost of professional setups. For example, hanging moving blankets on walls and sealing gaps can reduce noise by up to 50%.
But if you need serious isolation — for recording loud instruments or soundproofing a shared space — investing in custom soundproof cabinets or professional sealing might be necessary. Think of it like this: DIY is quick and cheap, but professional solutions are more reliable and scalable.
Why this matters: While DIY methods can significantly improve your environment, they may not provide the same level of isolation as professional treatments. The tradeoff is cost and effort versus effectiveness. Starting with DIY treatments allows you to test what works before investing heavily. For critical recordings or shared spaces, professional solutions ensure maximum soundproofing, but at a higher cost and installation effort. Balancing your budget with your needs will guide your choice.
Frequently Asked Questions
Will a closet actually sound good for recording?
Yes, if you treat the space with absorption materials, seal gaps, and position the mic correctly. A small, well-treated closet can produce dry, clear recordings ideal for voice-over, podcasts, or vocals.Do I need foam, panels, or blankets?
All can work. Foam panels are popular for high-frequency absorption, blankets and quilts help with flutter echoes, and layered DIY treatments are budget-friendly. The key is covering the main reflection points near your voice source.Where should I place the mic in a closet booth?
Place it about 6-12 inches from your mouth, aiming toward it, and away from walls. Use the mirror trick to find reflection points and treat those spots with foam or blankets for cleaner recordings.Should I treat behind the mic or behind me?
Both matter. The wall behind the mic should be absorbed to reduce reflections, and nearby surfaces like ceiling and side walls should also be treated to prevent flutter echoes.How do I stop echo and flutter in a small closet?
Use thick blankets, foam panels, and rugs to absorb reflections. Position the mic away from hard surfaces and treat the wall behind it for the best results.Conclusion
Moving your rig into a closet is a smart, cost-effective way to tame noise — if you treat it right. Focus on absorption, sealing gaps, and airflow, and your small space can sound surprisingly professional. Remember, it’s all about making your tiny studio work for your voice, not the other way around.
Think of your closet as a mini acoustic chamber, where careful placement and smart treatment turn chaos into clarity. Your perfect quiet space is just a few soft materials, seals, and fans away.